Welcome to my new blog, and we're starting off with a bang with the release of the Move Controller for AI-Shoujo StudioNEOV2
It looks much the same as the version for Honey Select StudioNEO, but there are some new features under the hood. And also for the benefit of new users, here's an overview of what the buttons do.
To start the mod, press the "move" button.

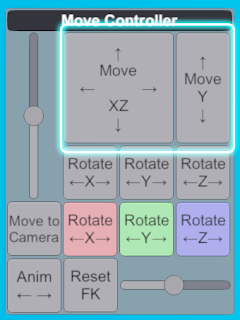
Click and drag these buttons to move the selected objects in the XZ or Y axis.
These buttons rotate the currently selected objects (character or item) relative to the camera. Their functionality has changed somewhat since version 1.4
X: Towards or away from the camera
Y: Around the top-down axis
Z: Left or right
Click or drag left-right to rotate, or click the left or right mouse button to rotate exactly 90 degrees in each direction
Y has a special feature; relative rotation. If you have multiple objects selected and click-drag the right mouse button, the selected objects will rotate around the first selected, as if they were parented to it. A nice feature for moving a group of characters around.
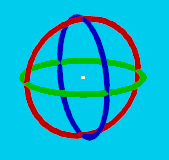
Use these coloured buttons to rotate around the guideobject (this thing):

The colour of the button rotates the corresponding coloured circle. The buttons work on both character/items and FK nodes, depending on what you have selected.
These buttons also have another feature: Multi FK! Use the mouse wheel to select one or more FK nodes! Scroll up to select the next node, and down for the previous node. Hold SHIFT while scrolling to select multiple nodes, you can now use the FK buttons to rotate them all at once. The mouse cursor must be inside the move controller window to use this feature.

This makes it a lot faster and faster and easier to get nice curves on items like ropes, chains, tentacles etc. You can hold ALT while scrolling to revert to having only one node selected.
Note that depending on how the bones in an object are laid out, the next FK node might always be what you'd expect. This feature is more useful on some objects than others.
This slider controls the magnitude of both the Move and Rotate buttons. Use it to adjust between doing fast movement or fine position adjustment.
This other slider controls the size of the FK nodes on the selected object. Very useful for seeing what you're doing with multi FK!
Left click the Move to Camera button to move all selected characters/objects to the camera position. Right click to move the first selected one to the camera position, and all other selected characters/objects are moved so that they keep the same position relative to the first selected. Nice for moving groups around.
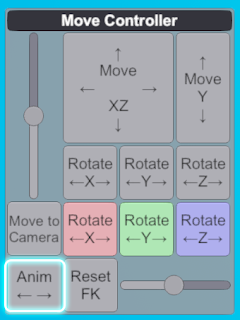
Click and drag this button to advance or rewind the animation on the currently selected character. Actually it works on both characters and animated items such as pets. It's a nice feature for picking the perfect frame in an animation for your scene, or as a start for making your own pose.
Reset FK will reset the selected FK node(s) to (0,0,0). Sometimes the only way to fix a mess is to start from scratch.

